Need Prepress assistance? Our Prepress Department is always here to help! Call 614.575.4242 ext. 223 or 224
Creating an InDesign File with Bleed
Creating bleed in a document is necessary when graphic elements are meant to go off the edge of the page. Bleed is created by extending the graphic beyond the trim edge of the page. This allows the page to be trimmed without the possibility of there being areas of white along the trim edge where the image stopped. Bleed is typically set to 1/8” (.125”)
For the purpose of illustration, we will be showing how to create a document with bleed in Adobe InDesign®. The concepts remain the same and are created in a similar way in other products with the exception of Adobe Photoshop® which we will cover separately at the bottom of this page.
Step 1
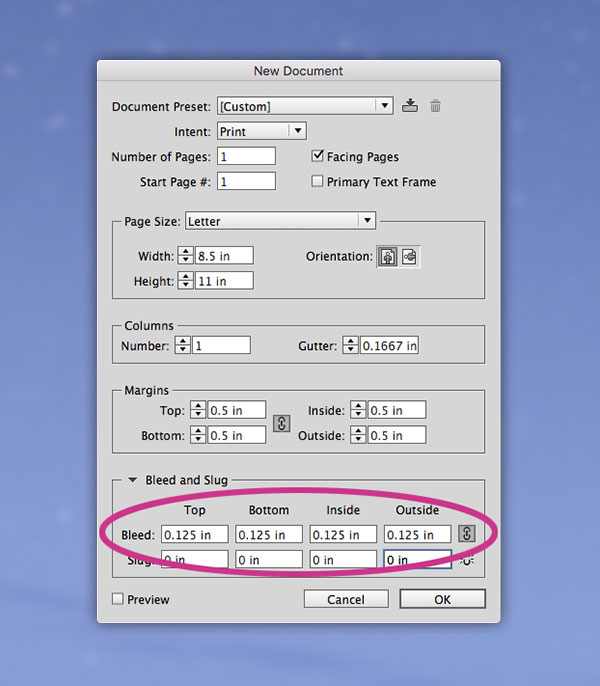
Start by creating a new document.

Step 2
At the bottom of the dialog box you will see the area to specify bleed. 1/8” (.125”) is the standard amount.
Step 2 Variation
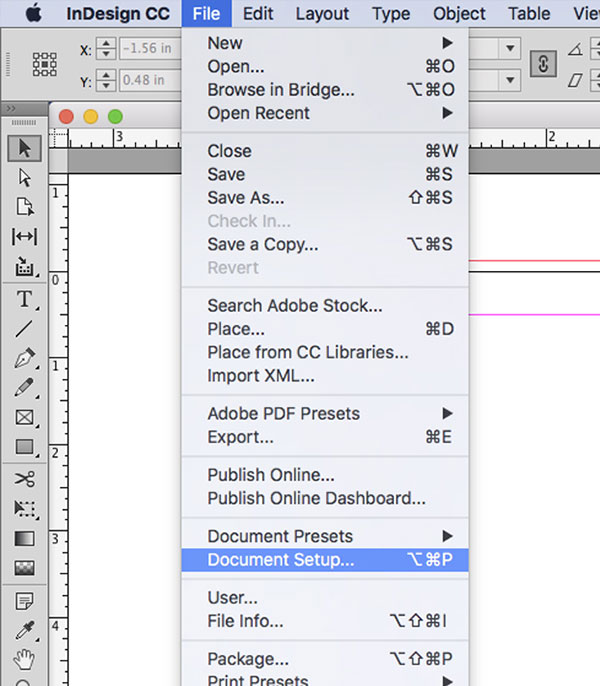
If you have already created your document but would like to add the bleed setting to it, go to File>Document Setup. Again, at the bottom of the dialog box you will see the area to specify bleed. 1/8” (.125”) is the standard amount.
Step 3
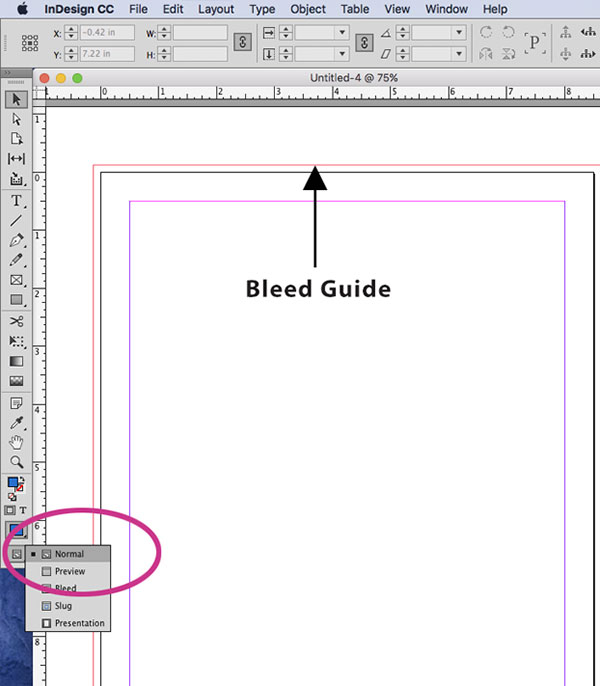
Once you have created or added the correct bleed settings to your document, it will appear as a red border around the outside of your document.
Step 4
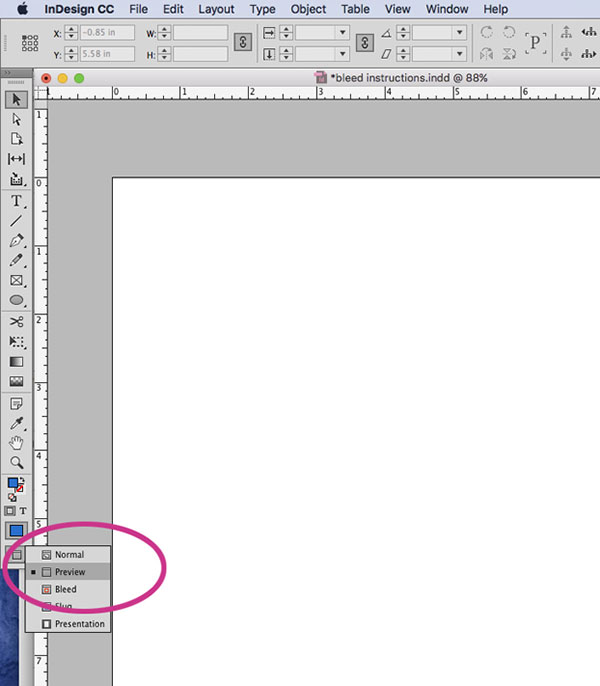
Be sure that you are in the Normal viewing mode and not the Preview mode. Preview mode hides all guides and bleeds to show you how your page will look at the finished size.
Step 5
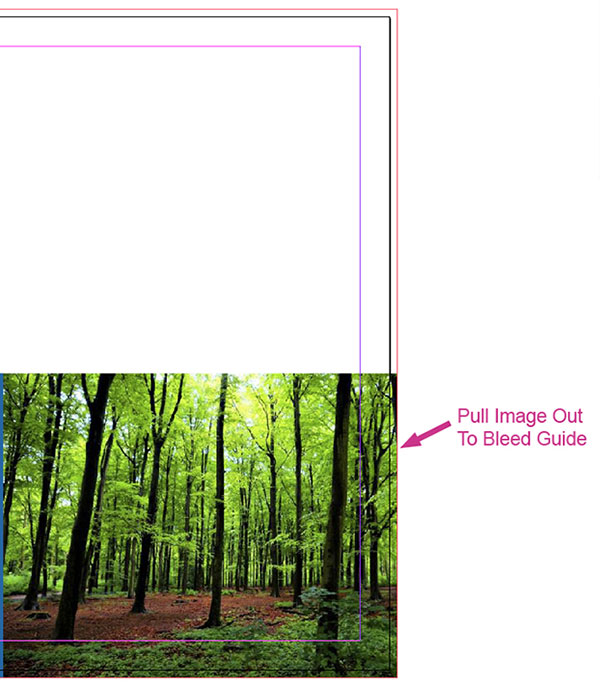
Now that you have the correct settings you can add your graphic elements and place them so that they bleed off the edge of the page.
Step 6
The final step is to create a High Resolution PDF with the bleed settings you specified. Instructions can be found here.
Creating a Photoshop File with Bleed
Creating bleed in Adobe Photoshop® is a slightly different process although the concept remains the same.
Step 1
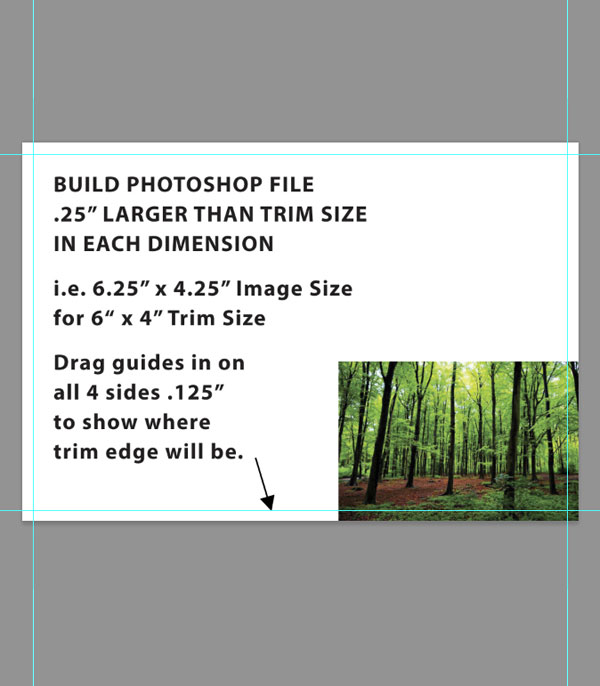
If you are creating a new document that requires bleed you are essentially adding the bleed dimensions to your Image Size. In other words, adding 1/8” (.125”) to all four sides of your file for a total of 1/4” (.25”) to the width and height.
Step 2
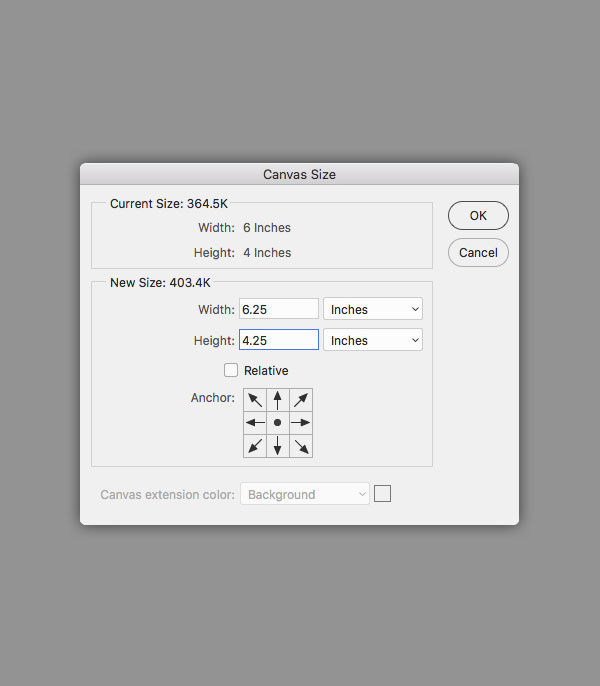
If you have already created your file and would like to add bleed to it, go to Image>Canvas Size. Again, 1/8” (.125”) to all four sides of your file for a total of 1/4” (.25”) to the width and height. NOTE: Be sure you change the Canvas Size, NOT the Image Size. Also, be sure that the you are changing the Canvas Size from the center so that the size increase goes to all four sides equally.
Step 3
Once you have created the extra space for the bleed you will need to draw in your guides and adjust your image elements to bleed as shown above.
Creating a Canva File with Bleed
Canva is an online layout tool that can be used to produce print-ready files. Follow the link below for instructions to add bleed and marks to your file before submitting.
Services
Design Resources
Contact
PXPOHIO Commercial Printing and Direct Mail
6800 Tussing Rd.
Reynoldsburg, OH 43068
Hours: M-F 8:00 AM to 5:00 PM (EST)
Email PXPOHIO
Phone: 614.575.4242
Web Design by Firm